Case Manager supports file attachments to cases by making use of the extensions. At the time of writing this post, there are two extensions available: one to access file attachments via an FTP protocol, and another making use of Windows folders shared on a local network. In a previous blog post we walked through setting up SFTP on Azure Cloud Storage to save our Case Manager file attachments securely in the cloud. Here, we will look at setting up a local shared folder.
The Case Manager Attachment File Share extension makes use of a shared location on the network, specified as a setting, to create separate subfolders per case to store associated files. A case’s associated folder can be accessed by clicking the silver paperclip icon on the toolbar.
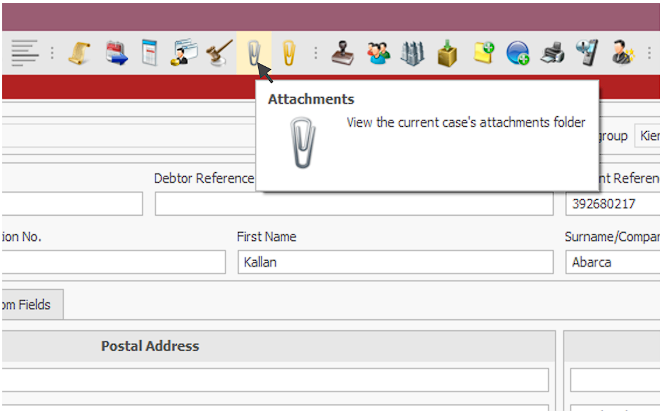
If the Attachments icon is not available on the toolbar, it may be that the extension is not installed. This can be verified in the Configuration Tools in the Extension Management section. If “Attachment File Share” is listed and active, you may have to customize the toolbar to view the button. This can be done by an administrative user in Case Manager by right-clicking on the toolbar and selecting “Customize”. Under the Commands tab you will find a list of toolbars each with its actions. The Attachments action can be found in the “Basic” toolbar. From the commands list you can drag the Attachments action to an appropriate location on the toolbar. When you close the customization form, you will be able to save the toolbar customization.
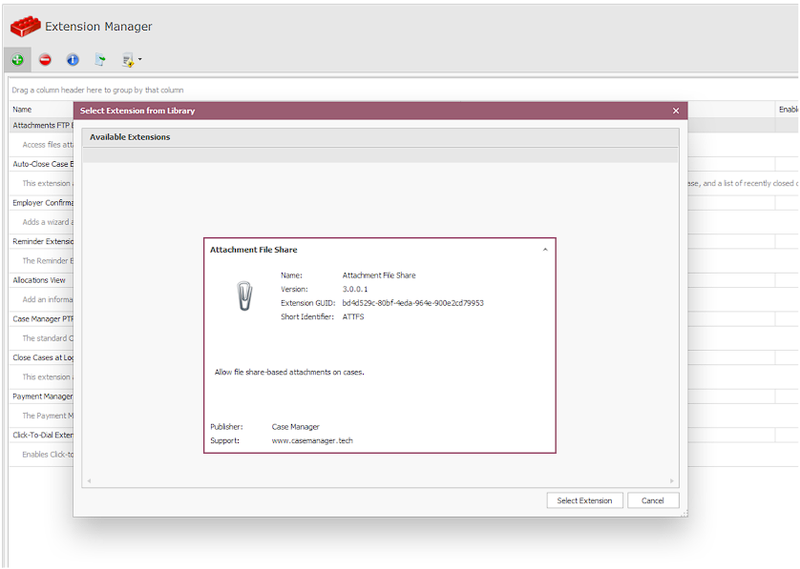
If, however, the Attachment File Share extension is not listed in the Extension Management section you will have to install it. Click “Add Extension” and browse to the extension file:
CaseManager.Extension.AttachmentFileShare.dll
This file may be in the CaseManagerExtensions folder on the server, or can be downloaded from the casemanger.tech website.
When the file is loaded you will need to confirm the extension to be installed. This may include a database installation process, depending on whether the extension was previously installed in the system. After completion the Attachment File Share extension will be listed in the Extension Management section.
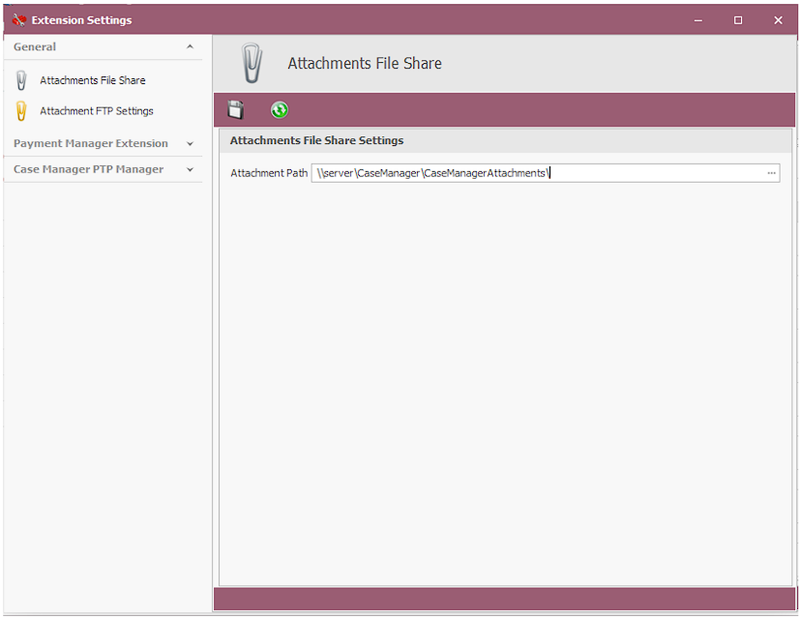
If the extension is installed and active, opening the Extension Settings in the Configuration Tools will present extension-specific settings. The Attachment File Share has only one setting, the network location of the file attachments. Note that the network path is specified, for example \\server\CaseManagerAttachments and not a local path (such as C:\CaseManager\CaseManagerAttachments ) since this will be used by the agent workstations to connect to the server location.
Access to the case-associated attachment folders are not managed by Case Manager, but instead by the protocols and settings provided by the Windows operating system. The extension settings in the previous section will simply point Case Manager to the right location; an administrator is still required to set up the network to allow users the required access. This blog article makes a few suggestions to allow network access to workstation, but it remains vital for the administrator to understand the security impact of the decision made and settings set.
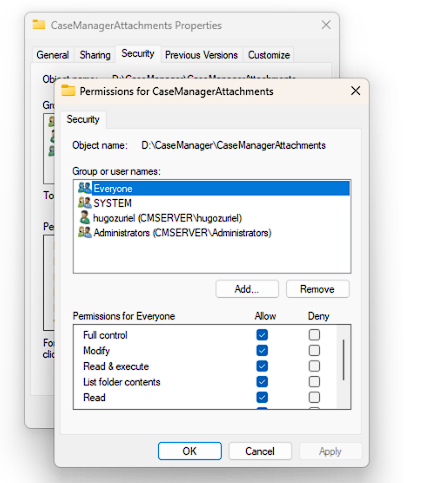
Any folder on the network can be used for Case Manager attachments, given that users on the network have both read and write access to this location. In general, we make use of the CaseManagerAttachments folder in the CaseManager folder on the server. Other folders in the CaseManager folder are typically shared on the network as well, such as the CaseManagerApps folder to install the applications on the agent workstations. For this folder, however, you do not want to give write access. The security settings will be covered in the Share the folder section of this post.
It is also important to take the chosen folder for attachments into consideration for your backup processes. Since the attached files are stored in the Windows file system and not in the Case Manager database, they will not be included in the database backup. Your backup processes should therefore include at least the database backup file (.fbk) and the attachments folder.
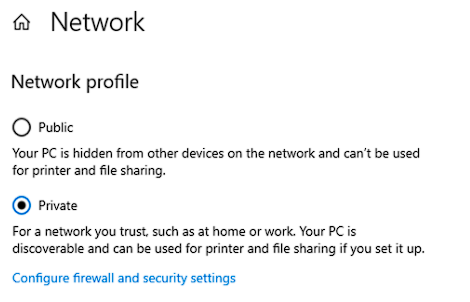
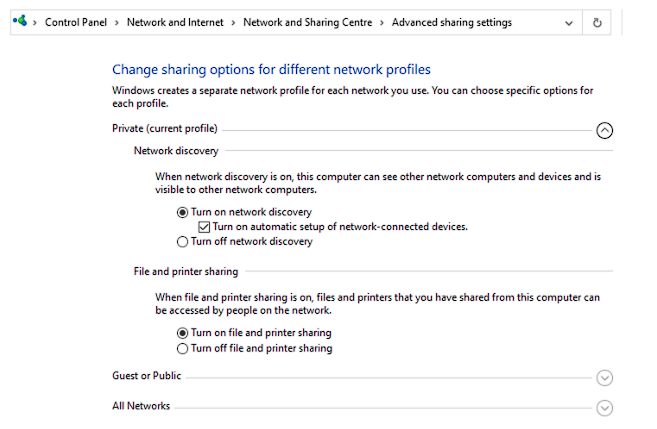
File Sharing in Windows requires the network to be a Private Network and to have file sharing enabled. Our first steps to sharing the attachments folder will be to verify that the network is set up to allow this.
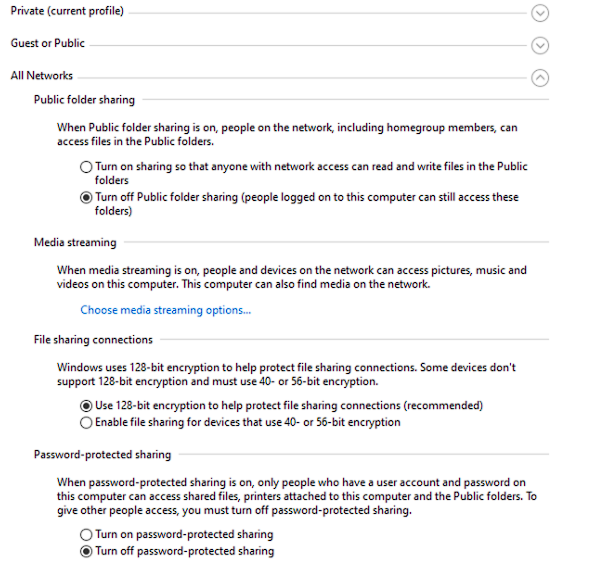
Windows 10
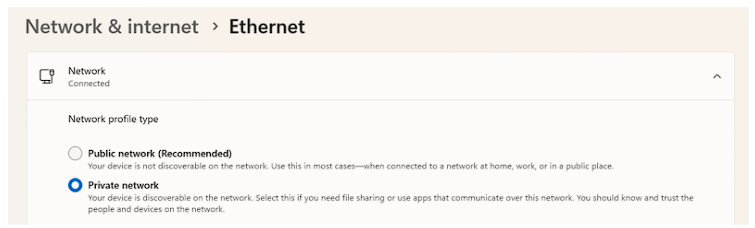
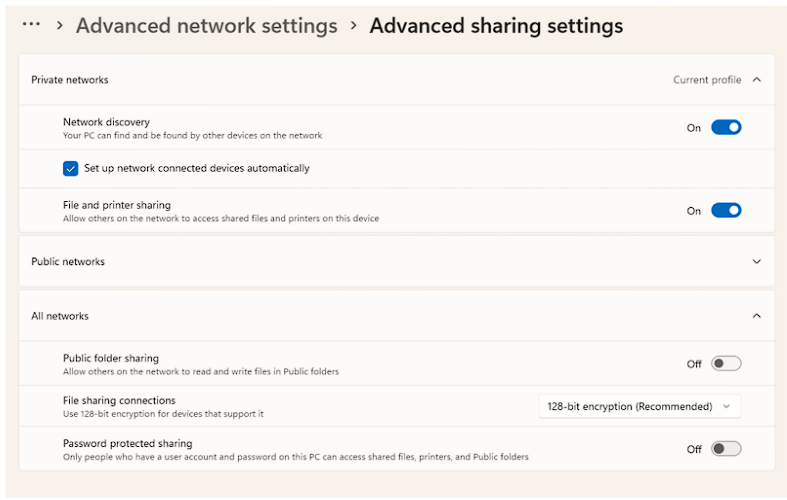
Windows 11
Other versions of Windows
The required settings remain the same for other versions of Windows. How to navigate to these settings may differ a bit. In essence, be sure that:
Once the folder is shared, you can access it via the network path: \\{SERVER}\{SHARE NAME} where {SERVER} is the name of the server hosting the attachment files, and {SHARE NAME} is name of the file share as set up. Open a file explorer window and type in the network path, for example \\CMSERVER\CaseManagerAttachments. If set up correctly, you would be able to see the contents of the shared folder. Also, create a new file - something simple such as a text file - to verify that you have write access to the shared folder. Repeat the test on another machine on the network.
The network path as described here should be set in the extension settings as explained previously. We will then be able to test attachment access from Case Manager: